The Science of Safe Cable Installation: Understanding Mechanical Limits for Australian Electricians
Proper electrical cable installation is not just about connecting point A to B—it's a precise science that ensures safety, optimal performance, and longevity of your electrical systems. In Australia, where extreme temperatures and varied environments from coastal regions to the outback present unique challenges, understanding the mechanical limits of cables becomes even more crucial. When mechanical limits are ignored during installation, the consequences can be severe: premature cable failure, electrical fires, increased maintenance costs, and potentially dangerous electrical faults. These issues often don't appear immediately but develop over time, making prevention through proper installation essential.
5/13/20255 min read


The Science of Safe Cable Installation: Understanding Mechanical Limits for Australian Electricians
Introduction
Proper electrical cable installation is not just about connecting point A to B—it's a precise science that ensures safety, optimal performance, and longevity of your electrical systems. In Australia, where extreme temperatures and varied environments from coastal regions to the outback present unique challenges, understanding the mechanical limits of cables becomes even more crucial.
When mechanical limits are ignored during installation, the consequences can be severe: premature cable failure, electrical fires, increased maintenance costs, and potentially dangerous electrical faults. These issues often don't appear immediately but develop over time, making prevention through proper installation essential.
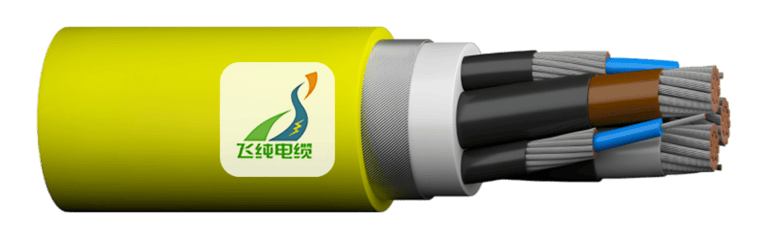
This article explores three critical mechanical properties that every Australian electrician, contractor, or DIY enthusiast should understand before installing cables: Cable Bending Radius, Maximum Pulling Tension, and Side Wall Pressure. Mastering these concepts will help you avoid common pitfalls and ensure your installations comply with Australian standards.
What Is Cable Bending Radius?
The Fundamental Limit on How Much You Can Bend a Cable
Cable Bending Radius refers to the minimum radius a cable can be bent without causing damage to its structure. Think of it as the cable's flexibility threshold—bend it beyond this limit, and you risk permanent damage.
When a cable is bent too sharply, several problems can occur:
The insulation on the outside of the bend stretches and may crack
The conductor on the inside of the bend compresses and can deform
In fiber optic cables, excessive bending can cause signal attenuation or total failure
Most manufacturers specify minimum bending radii as a multiple of the cable's outer diameter (OD). As a general guideline:
Power cables: 8-12 times the cable's OD (larger for high-voltage cables)
Communication cables: 10-15 times the OD
Fiber optic cables: 10-20 times the OD (depending on construction)
For example, if you're installing a power cable with a 25mm outer diameter, the minimum bending radius might be 200-300mm. This means any bend in your installation should form an arc with at least this radius.
Australian standards require adherence to manufacturer specifications, which may be more stringent than these general guidelines. Always consult the cable datasheet before installation.
Understanding Maximum Pulling Tension
How Hard Can You Pull Before Something Breaks?
Maximum Pulling Tension is the highest force that can be applied to a cable during installation without causing damage. This limit prevents stretching, distortion of conductors, or damage to insulation.
When pulling tension exceeds the cable's limit, several problems can occur:
Insulation may thin out at stress points
Conductors can stretch, increasing resistance and heating
Cable jackets may tear, exposing inner components to environmental damage
Internal components can shift, affecting electrical properties
Maximum pulling tension is typically measured in newtons (N) or kilonewtons (kN) and varies based on:
Cable construction and materials
Cross-sectional area of conductors
Presence of strength members (in composite cables)
Installation method
For copper conductors, a common rule of thumb is 30 N/mm² of conductor cross-sectional area. However, this is just a starting point—manufacturer specifications should always take precedence.
Managing Pulling Tension in Practice
To ensure you stay within safe limits:
Use a dynamometer (tension meter) connected between the pulling rope and cable grip
Apply cable pulling lubricant to reduce friction
Install cable rollers at regular intervals and at bends
Consider using mechanical pulling equipment with adjustable tension limiters
For long or complex pulls, calculate expected tension before starting
Australian Standard AS/NZS 3008.1 provides guidance on current-carrying capacity but also references installation methods that protect cable integrity. When selecting cables, this standard should be consulted alongside manufacturer pulling specifications.
Side Wall Pressure Explained
The Hidden Force That Can Crush Your Cable
Side Wall Pressure (SWP) is a less discussed but equally important mechanical limit. It refers to the force exerted on a cable against the side wall of a bend, curve, or pulley during installation.
When a cable changes direction during pulling, it presses against the inside surface of the bend. This pressure increases as:
The pulling tension increases
The bend angle becomes sharper
The bend radius decreases
Excessive side wall pressure can:
Deform the cable's outer jacket
Damage internal insulation
Crush delicate components like fiber optic strands
Create weak points that may fail later
Side wall pressure can be calculated using this formula:
SWP = T / R
Where:
SWP is side wall pressure (N/m)
T is tension (N)
R is the radius of the bend (m)
To minimize side wall pressure:
Use large-radius sheaves or pulleys at direction changes
Maintain appropriate tension during pulls
Install additional pulleys at sharp bends
Consider breaking complex pulls into shorter segments
For example, if you're pulling a cable with 1000N of tension around a bend with a 0.5m radius, the side wall pressure would be 2000 N/m. Manufacturer specifications will indicate the maximum allowable SWP.


Best Practices for Cable Installation in Australia
To ensure your cable installations meet Australian standards and withstand our unique climate conditions:
Pre-Installation Planning
Assess the entire route for potential friction points and tight bends
Verify conduit size is appropriate (generally at least 40% fill ratio)
Check manufacturer specifications for all mechanical limits
Consider ambient temperature effects on cable flexibility
Equipment Recommendations
Use cable jacks or cable rollers for support during long runs
Install properly sized pulling eyes that distribute tension evenly
Deploy tension monitoring equipment for major installations
Select appropriate lubricants for the cable type and environment
Regional Considerations
In coastal areas, ensure sealed connections to prevent salt corrosion
For underground installations in clay soils, allow for ground movement
In hot regions, account for thermal expansion during installation
For remote installations, factor in limited access for future maintenance
Common Mistakes to Avoid
Even experienced installers can make these errors:
Creating too tight bends at junction boxes or corners
Solution: Use sweeping bends or larger junction boxes
Pulling by conductor instead of using proper grips
Solution: Always use manufacturer-approved pulling grips that distribute tension across the cable
Ignoring cumulative stress in long runs with multiple bends
Solution: Calculate total expected tension, accounting for friction at each bend
Failing to monitor tension during installation
Solution: Use tension monitoring tools for all significant pulls
Overlooking conduit fill ratios
Solution: Follow AS/NZS 3000 (Wiring Rules) guidelines on appropriate conduit sizing
Pulling cables in extreme temperatures
Solution: Install cables during moderate temperatures or adjust techniques for extreme conditions
Conclusion
Respecting the mechanical limits of cables—Bending Radius, Maximum Pulling Tension, and Side Wall Pressure—is essential for creating safe, reliable, and long-lasting electrical installations. While it may be tempting to take shortcuts during installation, the long-term consequences of exceeding these limits can be costly and dangerous.
Australian electricians face unique challenges due to our diverse climate and terrain. By understanding these mechanical principles and following manufacturer specifications, you can ensure your installations will perform reliably for decades.
Always consult the relevant Australian standards, particularly AS/NZS 3000 (Wiring Rules) and AS/NZS 3008.1 (Selection of Cables), along with manufacturer datasheets before beginning any installation. When in doubt, consult with a licensed electrical engineer or experienced installer.
Remember, a properly installed cable is virtually maintenance-free, while an improperly installed one can be a persistent source of problems and hazards.

